Why Sewing is like Coding - Debugging
Whether I’m at a keyboard or behind my sewing machine, I spend most of my time not in the act of creating, but in the act of fixing. Debugging, testing, twea...
It all started with a need. I attend weekly tech meetups and often share event details on Discord with my group. But as the list grew, keeping things organized became a challenge. I realized that others—like friends outside the group—could benefit from these lists too. That’s when I decided to build a website. The moment my ideal domain name was available, I knew it was a sign to start. This blog will document how I got from just a domain name to a functioning website.
I have another domain on Squarespace and it was easy to set up, so I decided to go with them again. There are plenty of places to host your domain and content, and you don’t need to use the same website for both.
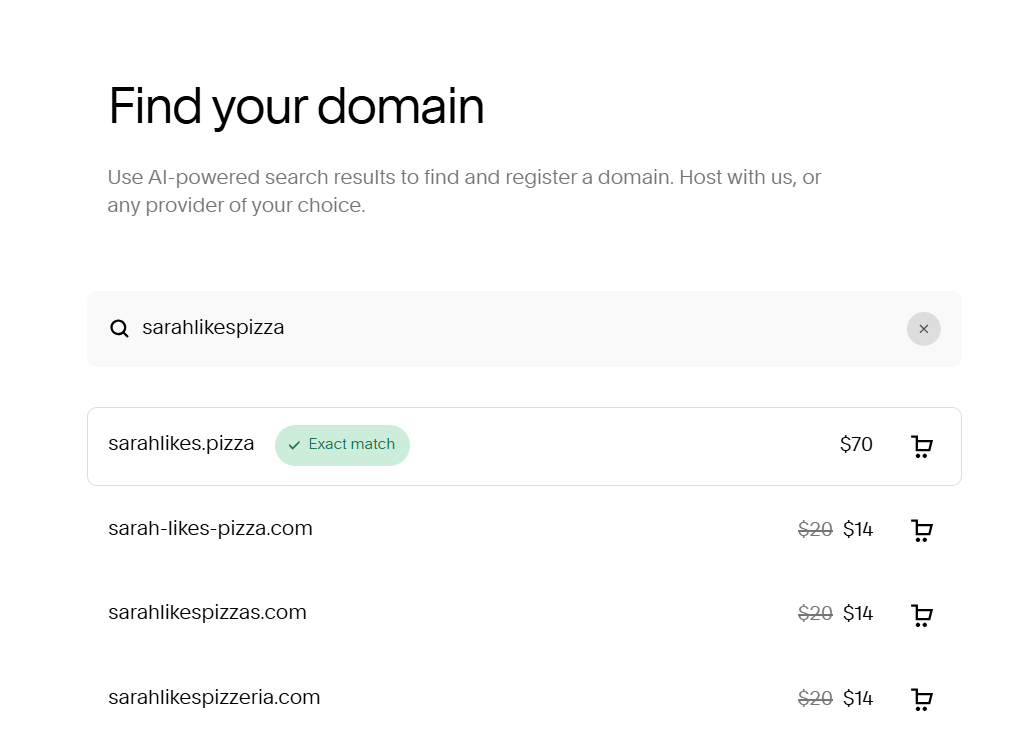 You’re not limited to .com; try something new like .pizza!
Note that the prices here are ANNUAL not monthly. Making a website can be affordable!
 Here you can see my new website that’s about to be made and the one you’re currently on.
Now that you have a name, how do you get content on it?
If you’re like me and want to keep things simple and affordable, GitHub Pages is a fantastic option. It’s free and perfect for hosting a straightforward website like this one.

Log in to your GitHub account (or create one if you don’t have it yet).
Click the “+” button in the top-right corner and select “New repository.”
Give your repository a name—ideally, something relevant like my-awesome-site.
Make sure to:
✨ Pro tip: The repository name will be part of your GitHub Pages URL, so keep it concise!

Navigate to your repository’s Settings tab.
Under Source, select the branch you want to use (typically main) and click Save.
Your site will be live in seconds—magic!
Now that GitHub Pages is enabled, it’s time to add some content to your website. Don’t worry—no coding experience or fancy tools are needed for this part!
Go to Your Repository on GitHub
Navigate to the repository you just created.
 Click ‘Add File’ near the top right
Add a New File
Write Your Website Code
In the text editor, paste this simple starter code:
 <!DOCTYPE html>
 <html>
 <head>
     <title>Welcome to My Site</title>
 </head>
 <body>
     <h1>Hello, world!</h1>
     <p>This is the beginning of my new website!</p>
 </body>
 </html>
 This is just to get started, we will change it soon.
Commit Your Changes
Scroll down to the bottom of the page. Under Commit new file, write a brief message like Add homepage and click the “Commit new file” button.
 Add a description if you like, but it’s not necessary
Wait a few seconds, then visit the URL GitHub Pages provided earlier (e.g., https://yourusername.github.io/repo-name/). You should see your new website live!

Now that your website is live on GitHub Pages, let’s connect it to your custom domain. Instead of a long GitHub URL, your visitors will type something sleek like yourcooldomain.com to see your site.
This is the website where you purchased your domain (e.g., Squarespace, Namecheap, GoDaddy, etc.).
Navigate to the DNS settings or Domain management section for your domain.
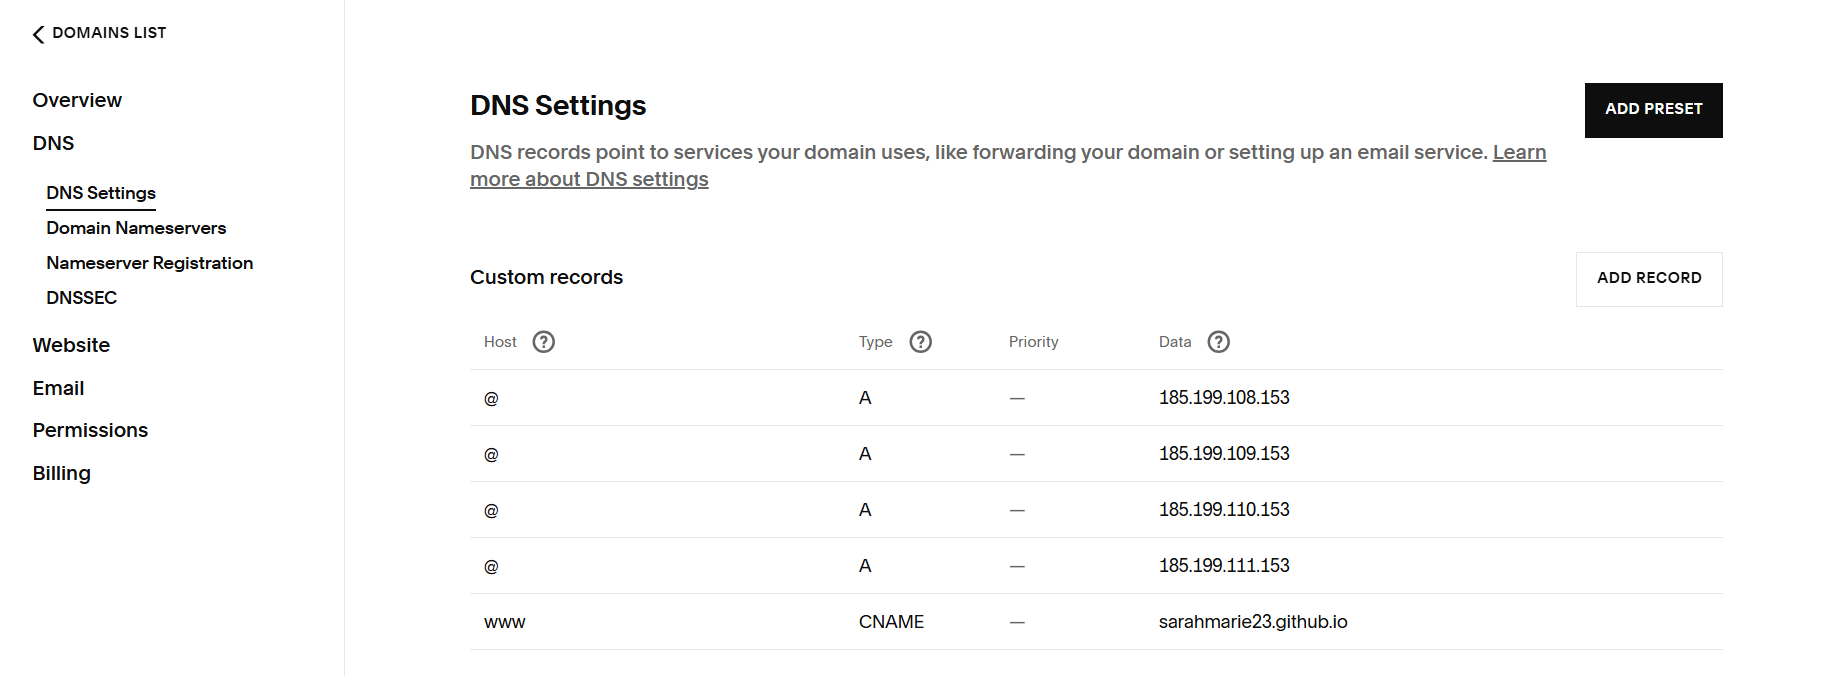 Add in these five records. These are necessary to tell your domain registrar that your website content is being hosted on GitHub.
You might need to wait! Don’t worry if you initially get this error:
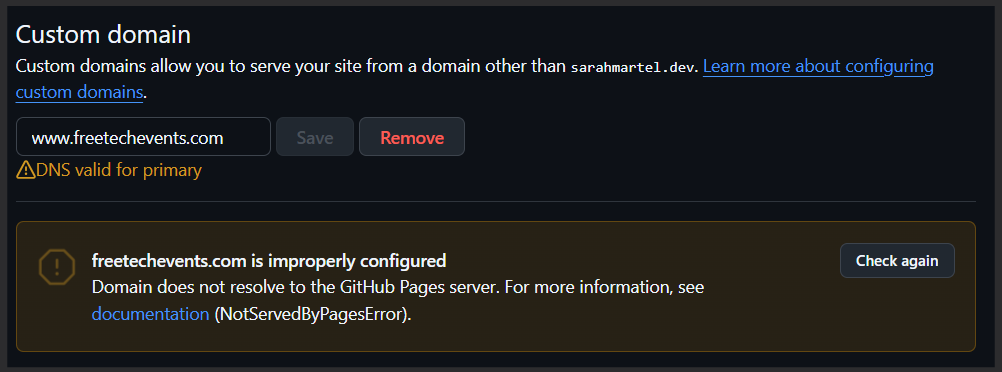
Or this error!
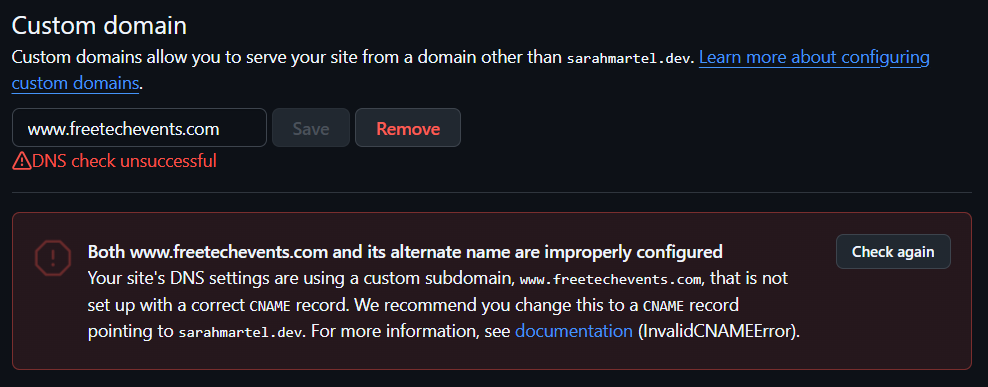
Try again later today.
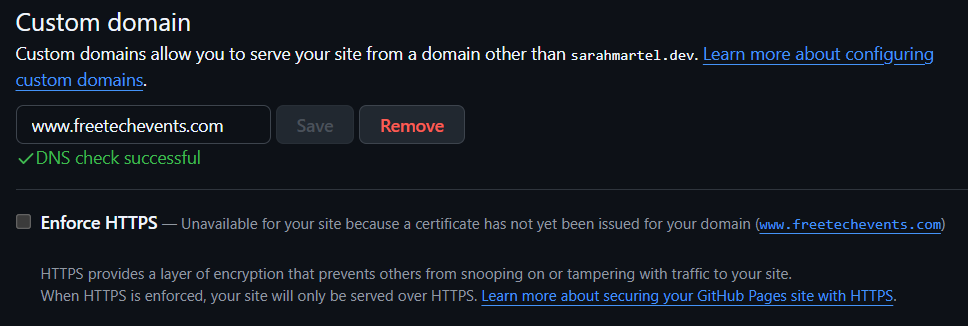 I came back 6 hours later and now the DNS check was successful!
When everything is loaded and ready, you should also check the ‘Enforce HTTPS’ box for extra encryption protection. After waiting 6 hours, I was still unable to check the box. I will try again tomorrow.
✨ Pro Tip: If your domain isn’t working after 48 hours, double-check:
That’s it! If everything is set up correctly, you’ll see your GitHub Pages site live under your custom domain! Now it’s time to start coding and add some content. 😊
Whether I’m at a keyboard or behind my sewing machine, I spend most of my time not in the act of creating, but in the act of fixing. Debugging, testing, twea...
Iterative testing. Getting the customer involved early and often. These key ideas are not only frequently mentioned but thoroughly explained in books about a...
It all started with a need. I attend weekly tech meetups and often share event details on Discord with my group. But as the list grew, keeping things organiz...
Eric Ries 2011
Jake Knapp, John Zeratsky, Braden Kowitz 2016
Andrew Stellman & Jennifer Greene 2014
What is this ‘Maker Faire?’
Getting the thoughts out there - using Lucidchart
What’s the least amount of (and most important) features we need to make for the design so that we can start testing?
How do you know when to stop? We discussed the research that our group has been working on. Two students are looking through the App Store and Google Play St...
AI/Tech Coffee Social ☕
Friday Team Meeting #1 - Online edition
Tuesday Team Meeting #2: Getting the hang of it
Monday Meeting #2: Reconvening after our First Full Week of Work
Maja Dakic 2023
Jeff Gothelf & Josh Seiden 2021
John Whalen, PhD. 2019